How To Fix Central Air Conditioner Leaking Water: A Step-by-Step Guide
The central air conditioning unit in your home is a valuable piece of equipment. It's important to keep it working to stay comfortable during summer. One common issue with air conditioners is when they leak water. This can cause extensive damage to your home and be very costly. If your central air conditioning unit leaks water, don't wait to fix it.

Fixing a Leaking Central Air Conditioner: 7 steps to fix it
If you've been having a problem with your central air conditioning unit leaking water, this guide will show you how to fix it. There are 7 tips that you can follow, so read on and fix the problem.

1. Remove the filter before trying any repairs
The first thing you need to do if you notice a leaky air conditioner removes the front grill (where the filters go). This step keeps debris out of the unit while reducing the chance of damaging the compressor. Try to have someone help you with this task. You want to avoid accidentally breaking something. Once done, replace the filter and see if you still notice the leak.
2. Look at the evaporator coil
If you find that the evaporator coil looks damaged or is not making ice anymore, you may need to replace it. To check whether the evaporator coil is the problem, follow these steps:
- Take off the cap on the bottom side of the condenser fan.
- Twist the top right section clockwise until it snaps back. This loosens the screw holding the evaporator coil in place.
- Now, pull the evaporator coil straight up using pliers or tweezers. If it's cold outside, use a hair dryer or hairdryer to warm it up.
- Unscrew the screws and take off the assembly covering the evaporator coil.
- Clean the coils thoroughly using a wire brush or toothbrush. This should get rid of any remaining dirt or grime.
- Reattach the cover and tighten both screws. Replace the capacitor and test the system to ensure it works properly.
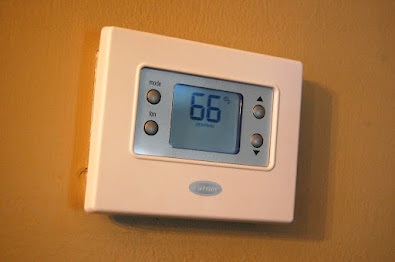
3. Check the thermostat
You're going to want to change the temperature setting on your thermostat. Your HVAC technician may advise doing so as well. If the thermostat isn't working correctly, you'll want to set the unit to 78 degrees Fahrenheit. This helps prevent water damage inside the unit.
4. Check the drain pan
Your drain pan could be clogged, causing moisture to build up inside the unit. Drain pans should be emptied regularly. If they aren't cleaned often enough, they could cause problems. A full drain pan will lead to mold and mildew growth around the sides and base of the unit. Not only does this reduce the unit's efficiency, but the mold can even affect the house's structure. To clean your drain pan, run some hot tap water through the system and let it sit overnight. Follow the instructions provided by your HVAC technician.
5. Keep your vents open while cleaning
Keeping your vents open while performing these maintenance tasks might reduce some of the effort involved with fixing your leaky AC.
6. Clean out your ductwork
You’ll want to get rid of all the accumulated dirt and grime that could be clogging the air filters or causing condensation.
7. Call a professional
Don’t attempt to repair any heating system unless you’ve extensive experience doing so. A good HVAC service technician can give you much-needed advice and tips.
Conclusion
If your central air conditioning unit leaks water, there are several things you can do to fix it. Follow these instructions, and your AC will be up and running in no time!

Comments
Post a Comment